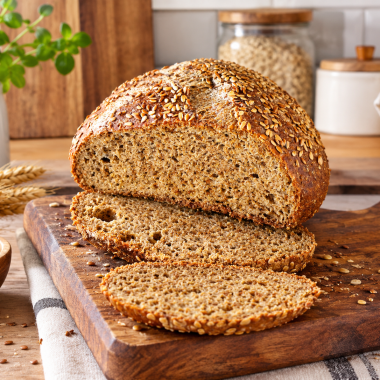
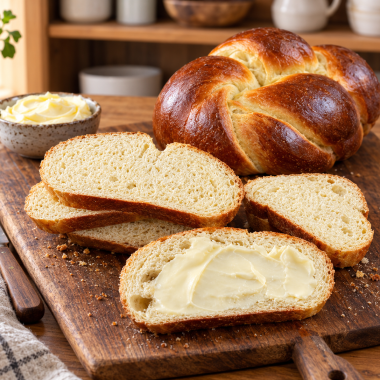
A homemade sourdough country loaf is one of the most satisfying breads to bake from scratch. This version combines bread flour and whole wheat flour to create a loaf with a gently nutty flavor, a golden crust, and a pleasantly open yet even crumb.
The natural fermentation from an active sourdough starter gives the bread its characteristic depth of flavor without relying on commercial yeast. The result is a versatile loaf that works beautifully for breakfast, sandwiches, toast, French toast, or simply enjoying with butter.
Unlike quick bread recipes, naturally leavened sourdough requires patience because fermentation plays an important role in the final texture and flavor. The dough needs time to develop strength, rise gradually, and build the subtle tang associated with good sourdough bread.
This recipe uses a combination of room-temperature bulk fermentation and a longer cold fermentation in the refrigerator. The extended fermentation allows the dough to develop a more complex flavor while making the baking process easier to fit around your schedule.
Why This Sourdough Country Bread Works So Well
The combination of whole wheat flour and bread flour gives this country loaf a useful balance between flavor and structure. Whole wheat flour contributes a slightly earthy character and additional texture, while bread flour provides the gluten strength needed to support fermentation and create a nicely shaped loaf. Using both types of flour keeps the bread from becoming overly dense while still giving it more personality than a loaf made entirely with white flour.
Another important part of the recipe is the active sourdough starter. A healthy starter should be lively, bubbly, and capable of rising substantially after feeding. When the starter is at its strongest, it can efficiently ferment the dough and help produce a light crumb. If your starter is sluggish or has not been fed recently, the dough may take considerably longer to ferment, so starter activity is one of the first things to consider when planning your baking day.
Preparing the Active Sourdough Starter
The starter should be prepared approximately 12 hours before mixing the main dough. Combine the specified starter, all-purpose flour, and water in a clean jar and stir until evenly incorporated. Leave the mixture loosely covered at room temperature. As fermentation progresses, the starter should expand and develop bubbles throughout the mixture.
The starter is ready when it has approximately doubled in volume and shows plenty of visible bubbles along the surface and sides of the container. The exact timing can vary depending on the temperature of your kitchen and the activity of your starter. A warmer environment generally speeds fermentation, while a cooler kitchen can make the process considerably slower. For the best results, use the starter when it is active rather than waiting until it has completely collapsed.
Mixing the Sourdough Dough
Once the starter is active, begin preparing the dough. Place 330 grams of the water and the active sourdough starter into a large mixing bowl. Stir them together before adding the whole wheat flour and bread flour. Mix everything with your hands until the flour is fully moistened and no dry patches remain.
At this stage, the dough may look rough, sticky, and uneven. That is completely normal. The purpose of this first resting period, often called an autolyse, is to allow the flour to absorb water and begin developing gluten before the salt is introduced. Cover the bowl and leave the dough at room temperature for one hour.
Adding Salt and Building Dough Strength
After the first resting period, dissolve the fine sea salt in the remaining 30 grams of water. Add this mixture to the dough and work it through with your hands until the salt water is evenly distributed. The dough may initially feel slippery or loose, but continued handling will help incorporate the liquid.
Cover the bowl again and allow the dough to rest for another hour. This rest gives the flour and developing gluten time to settle before the main fermentation stage begins. At this point, the dough should gradually become smoother and more elastic than it was immediately after mixing.
Bulk Fermentation and Stretch-and-Fold Technique
Bulk fermentation is one of the most important stages in a sourdough bread recipe. During this period, the microorganisms in the starter ferment the dough while gluten strength continues to develop. Instead of kneading the dough heavily, this recipe uses three sets of stretch-and-fold movements during the first hour and a half.
For each set, wet one hand and gently lift one side of the dough. Stretch it upward until you feel resistance, then fold it over the dough. Rotate the bowl and repeat the movement around all four sides. The goal is to strengthen the dough without tearing it or handling it aggressively.
Perform the three sets approximately 30 minutes apart. After the final set, cover the dough and let it continue fermenting at room temperature. The remaining fermentation time depends heavily on kitchen temperature, so observing the dough is more reliable than following the clock alone.
At approximately 68°F (20°C), allow another 2–3 hours. At 70°F (21°C), approximately 2–2.5 hours may be sufficient. At 72°F (22°C), the remaining time may be around 1.5–2 hours, while at 75°F (24°C), approximately 1–1.5 hours may be enough.
The dough is generally ready to shape once it has increased in volume by about 20–30 percent and bubbles can be seen around the edges of the bowl. Avoid waiting for the dough to double completely because excessive fermentation can make shaping difficult and affect the finished loaf.
Shaping the Country Loaf
Turn the fermented dough onto a lightly floured work surface. Use a bench scraper to gently gather the dough into a loose round shape. Avoid pressing out all the air that has developed during fermentation. Cover the dough and let it rest for approximately 20 minutes.
After the rest, lightly flour the outside of the dough and carefully turn it over. Bring the side closest to you toward the center, then repeat the movement with the other sides. This creates surface tension while keeping the interior structure intact.
Turn the dough seam-side down and gently tighten the outside by cupping it with your hands and drawing it toward yourself across the work surface. The objective is to create a smooth, taut outer surface without tearing the dough. Once shaped, lightly flour the dough and the inside of a banneton before placing the dough seam-side up inside it.
Cover the banneton and leave the dough at room temperature for approximately 30 minutes before moving it into the refrigerator.
Cold Fermentation for Better Sourdough Flavor
The second rise takes place in the refrigerator and can last anywhere from 8 to 36 hours. This cold fermentation stage is particularly useful for developing flavor and making the dough easier to handle. The cooler environment slows fermentation while allowing the sourdough culture to continue working gradually.
A longer refrigerated fermentation can produce a more developed flavor, but the dough should still be monitored according to the condition of your starter and the temperature of your refrigerator. If the dough appears excessively expanded or fragile, it may already be fully fermented.
Scoring and Baking the Sourdough Loaf
When you are ready to bake, remove the dough from the refrigerator and allow it to sit at room temperature for approximately 30 minutes. Meanwhile, place your Dutch oven inside the oven and preheat to 500°F (260°C) for 30 minutes.
Turn the dough onto parchment paper and use a razor or bread lame to make the desired score across the surface. Scoring gives the loaf a controlled area to expand during oven spring. Without an intentional score, the bread can split unpredictably as steam and expanding gases push through the crust.
Carefully remove the hot Dutch oven and transfer the dough into it using the parchment paper as a sling. Cover the Dutch oven, reduce the oven temperature to 450°F (232°C), and bake for 20 minutes. Remove the lid and continue baking for another 25–30 minutes, or until the crust reaches the color and level of browning you prefer.
Cooling the Bread Before Slicing
Freshly baked sourdough bread can smell irresistible, but it is important to resist cutting into it immediately. Place the finished loaf on a cooling rack and allow it to cool for approximately two hours. During this time, the crumb continues to set and moisture redistributes throughout the loaf.
Cutting sourdough bread too early can result in a gummy or compressed interior, even when the loaf has been baked correctly. Once completely cooled, use a sharp bread knife to slice through the crust. The finished loaf should have a pleasantly chewy crust and a tender crumb with a mildly sour flavor.
Notes for Measuring and Working With Flour
A kitchen scale is the most reliable way to measure flour and water for sourdough baking because small differences in flour quantity can significantly change dough hydration. If you do not have a scale, use the scoop-and-level method rather than packing flour directly into the measuring cup. Loosen the flour first, spoon it into the cup, and level the surface with the straight edge of a knife.
Flour brands can also behave differently because protein content and milling characteristics vary. These differences can affect water absorption, gluten development, and the overall feel of the dough. For consistent results, pay attention to the dough itself rather than relying exclusively on the stated fermentation times.
Adjustments for Warm or Humid Kitchens
Temperature can have a major effect on sourdough fermentation. If your kitchen is warmer than approximately 68°F, check the dough sooner after the final stretch and fold. A warm environment can accelerate fermentation considerably, and leaving the dough unattended for too long may result in over-proofing.
In warm or humid conditions, the dough may also feel wetter and more difficult to handle. The original method suggests reducing the initial water by 50 grams and gradually adding the remaining water until the desired consistency is reached. Baking may also require an additional 5–10 minutes with the lid on before uncovering the Dutch oven and finishing the crust.
Storage and Freezing
For the best texture, store the cooled loaf at room temperature rather than in the refrigerator. Wrap it in a clean kitchen towel or beeswax wrap, or place the cut side down on a cutting board and cover it with a cake stand or similar container. Refrigeration can cause sourdough bread to become firm and stale more quickly.
If you want to keep the bread longer, freezing is a convenient option. The entire loaf or individual slices can be wrapped tightly and placed in a freezer-safe container for up to three months. Individual slices are especially convenient because they can be removed as needed for toast, sandwiches, breakfast, or French toast.
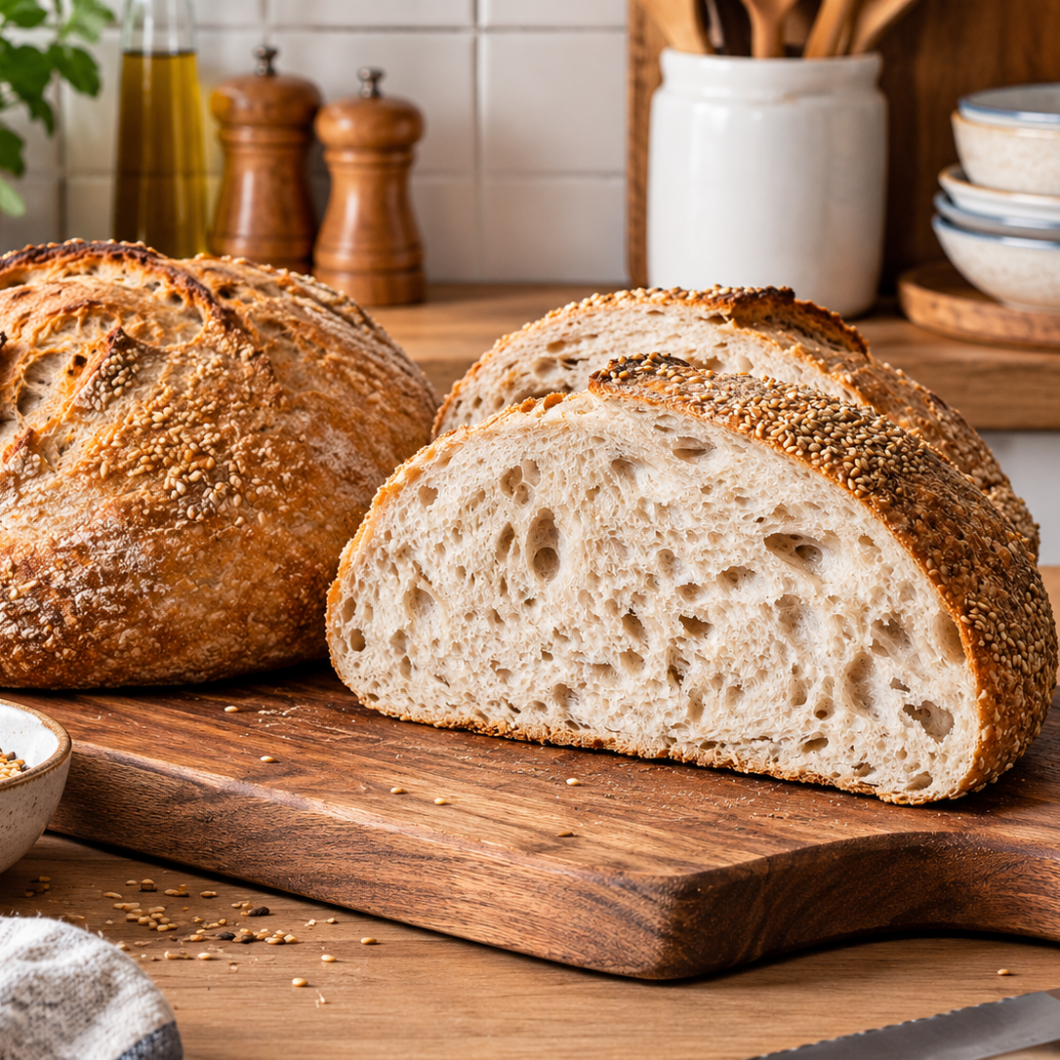
Sourdough Country Loaf
 Recipe by admin1
12
servings40
minutes50
minutes157
kcal12
hours13
hours30
minutesIngredients
- Ingredients to Make ½ Cup (100 g) Active Sourdough Starter
1 tablespoon (15 g) sourdough starter
⅓ cup + 1 tablespoon (50 g) all-purpose flour
3 ½ tablespoons (50 g) water
- Dough Ingredients
½ cup (100 g) active sourdough starter
1 ½ cups (360 g) water (30 grams divided)
⅓ cup + 1 tablespoon (50 g) whole wheat flour
3 ¾ cups (450 g) bread flour
2 teaspoons (10 g) fine sea salt
Directions
- About 12 hours before mixing the dough, combine the sourdough starter, all-purpose flour, and water in a clean jar. Stir thoroughly, loosely cover the jar, and leave it at room temperature. The starter is ready when it has approximately doubled in volume and contains plenty of bubbles along the surface and sides.
- Place 330 grams of water and 100 grams of active sourdough starter in a large mixing bowl. Stir together, then add the whole wheat flour and bread flour. Mix by hand until all the flour is hydrated and no dry patches remain. Cover and let the dough rest for 1 hour.
- Combine the 10 grams of fine sea salt with 30 grams of water. Stir until dissolved, then add the mixture to the dough. Work it through with your hands until evenly incorporated. Cover and let the dough rest for another hour.
- Perform three sets of stretch and folds at 30-minute intervals. For each set, use a wet hand to lift one side of the dough, stretch it gently, and fold it over itself. Rotate the bowl and repeat on all four sides.
After completing the three sets, cover the dough and continue fermenting at room temperature for another 1–3 hours depending on kitchen temperature. The dough should increase by approximately 20–30 percent and show bubbles around the edges. - Transfer the dough to a lightly floured surface and use a bench scraper to form a loose round. Cover and rest for 20 minutes. Turn the dough over, bring each side toward the center, and create surface tension by gently pulling the dough toward yourself. Flour the dough and banneton before placing the dough seam-side up inside.
- Cover the banneton and leave the dough at room temperature for approximately 30 minutes. Transfer it to the refrigerator and allow it to cold ferment for 8–36 hours.
- Remove the dough from the refrigerator and let it sit at room temperature for 30 minutes. Preheat the oven with a Dutch oven inside to 500°F (260°C) for 30 minutes.
Turn the dough onto parchment paper and score the top with a razor. Carefully transfer the dough into the hot Dutch oven using the parchment as a sling. Cover, reduce the oven temperature to 450°F (232°C), and bake for 20 minutes.
Remove the lid and bake for another 25–30 minutes, or until the crust reaches your preferred level of browning. - Transfer the baked loaf to a cooling rack and allow it to cool for approximately 2 hours before slicing. This gives the crumb enough time to finish setting and helps prevent a gummy texture.
Notes
- Handle the dough gently during the stretch-and-fold process and stop stretching when the dough begins to tighten.
- In warmer kitchens, check the dough earlier because fermentation can progress faster.
- If your kitchen is warm or humid, you may need to reduce the initial water by 50 grams and gradually add the remaining water until the dough reaches the desired consistency.
- For accurate flour measurement without a scale, loosen the flour, spoon it into a measuring cup, and level it with a knife.
- Use appropriate heat-resistant gloves when handling the hot Dutch oven.
- Allow the loaf to cool completely before slicing.
- Store the bread at room temperature wrapped in a kitchen towel or beeswax wrap. Refrigerating sourdough bread can make it become hard.
- For longer storage, wrap the whole loaf or individual slices tightly and place them in a freezer-safe container for up to 3 months.
Nutrition Facts
- Total number of serves: 1
- Calories: 157kcal
- Fat: 21g
- Carbohydrates: 32g
- Fiber: 1g
- Sugar: 1g
- Protein: 5g