If you want an easy keto dessert that tastes like a proper chocolate candy rather than a typical low-carb substitute, this Easy Keto Chocolate Nougat Candy is worth trying. The recipe brings together creamy coconut, unsweetened desiccated coconut, monkfruit sweetener, and a smooth sugar-free chocolate coating.
The result is a rich homemade treat with a soft, chewy center and a firm chocolate shell. It is simple enough for beginners and convenient enough to prepare ahead for quick desserts or sweet snacks.
Homemade keto candy does not have to involve complicated techniques, candy thermometers, or long cooking times. This no-bake chocolate coconut candy is prepared by combining the coconut filling ingredients, shaping the mixture into small bars, chilling them until firm, and coating them with melted chocolate. The process is especially convenient when you want a low-carb dessert without turning on the oven. Once finished, the candies can be stored in the refrigerator or freezer, making them useful for planned snacks throughout the week.
Why This Keto Chocolate Candy Works So Well
The appeal of these homemade keto chocolate bars comes from the contrast between the filling and the coating. The coconut mixture provides a dense, soft, slightly chewy center, while the chocolate creates a smooth outer layer that becomes firm after chilling. Coconut cream contributes richness, coconut oil helps the mixture hold together, and desiccated coconut gives the center its characteristic texture. Monkfruit sweetener adds sweetness without relying on traditional granulated sugar, making the recipe a practical choice for people looking for a sugar-free or low-carb dessert.
Another advantage is the uncomplicated preparation. You do not need specialist confectionery equipment to make these chocolate coconut bars at home. A mixing bowl, a tray lined with parchment paper, and a simple method for melting chocolate are enough. The most important part is making sure the coconut mixture is compact and sufficiently chilled before dipping. When the filling is firm, it is easier to handle, less likely to crumble, and much easier to cover evenly with melted chocolate.
The Coconut Filling
The coconut center is what gives this keto candy its distinctive flavor and texture. Unsweetened desiccated coconut provides the structure, while coconut cream makes the mixture richer and softer. Coconut oil helps bind the ingredients and becomes firmer when chilled. Together, these ingredients create a filling that can be pressed and shaped into small rectangular pieces before the chocolate coating is added.
For the best texture, the coconut mixture should be mixed thoroughly so the ingredients are evenly distributed. The mixture needs to be moist enough to hold together but firm enough to shape. If the filling is handled loosely, individual pieces may break apart when they are dipped into melted chocolate. Compressing each portion firmly while shaping helps create a stronger center that remains intact during coating and storage.
Preparing the Coconut Mixture
Begin by preparing the coconut filling in a suitable mixing bowl. Combine the coconut cream, coconut oil, unsweetened desiccated coconut, and monkfruit sweetener according to the supplied recipe. Stir thoroughly until the mixture is evenly combined and has a thick consistency. The desiccated coconut should be distributed throughout the creamy mixture rather than remaining concentrated in one area of the bowl.
The finished mixture should be easy to press together. It should not be so wet that it spreads across the tray, and it should not be so dry that it immediately crumbles when shaped. The exact texture can vary slightly depending on the type of coconut cream and desiccated coconut used. Taking a little extra time to mix and compress the ingredients is one of the easiest ways to improve the finished keto candy.
How to Shape Keto Coconut Candy
Once the filling has been mixed, divide it into small portions and shape each portion into a compact rectangle approximately 2–3 inches long. Try to keep the pieces similar in size so that they chill at roughly the same rate and receive a consistent chocolate coating. There is no need for professional candy molds because the filling can be shaped by hand on a parchment-lined tray.
If you prefer perfectly uniform pieces, a small silicone mold can also be used. Press the coconut mixture firmly into each cavity, making sure there are no loose gaps. Whether you shape the bars by hand or use a mold, firm compression is important. A tightly packed center is much easier to dip and will give the finished candy a cleaner appearance.
Why Chilling the Filling Matters
Chilling is an important step in this no-bake keto dessert. Once the coconut bars have been shaped, place them on a parchment-lined tray and transfer them to the freezer for approximately 20–30 minutes, or until they become firm. The colder, firmer center is easier to lift and dip into melted chocolate without losing its shape.
Skipping the chilling stage can make the coating process unnecessarily difficult. A soft coconut center may bend, crumble, or stick to the dipping tool when it comes into contact with warm melted chocolate. A properly chilled center gives you much more control. If the pieces begin to soften while you are working, simply return them to the freezer for several minutes before continuing.
Choosing the Chocolate Coating
The chocolate coating gives these homemade keto coconut bars their rich finishing flavor. The supplied recipe calls for 7 ounces of sugar-free chocolate chips or chocolate with high cocoa solids. Choose a chocolate that fits your preferred low-carb approach and melts smoothly. A rich dark chocolate can provide a deeper cocoa flavor, while a sweeter sugar-free chocolate creates a more dessert-like finish.
The chocolate should be melted gently rather than exposed to intense heat. A double boiler is a reliable option because it allows the chocolate to warm gradually. A microwave can also work well when used in short intervals. Heat the chocolate for about 20 seconds at a time, stirring thoroughly between intervals. Continue until it becomes smooth and fluid, taking care not to overheat it.
Making the Chocolate Smooth for Dipping
A smooth coating makes a noticeable difference in the appearance of homemade candy. If the melted chocolate is too thick to coat the coconut bars easily, the supplied recipe notes that a small amount of coconut oil can be mixed into the warm chocolate. This can make the coating more fluid and easier to spread over the surface of each piece.
The chocolate should be completely melted before dipping begins. Avoid adding large amounts of oil because an overly thin coating may take longer to set and can become softer during storage. Work with the chilled coconut bars while the chocolate remains warm and fluid. This helps create an even shell around the filling without requiring excessive handling.
Coating the Coconut Bars
When the coconut pieces are firm and the chocolate is smooth, carefully dip each piece into the melted chocolate. A fork works well for this step because it allows excess chocolate to drain away before the candy is placed on the parchment paper. Turn each piece gently so the chocolate reaches the top, bottom, and sides.
After dipping, allow excess chocolate to drip back into the bowl before transferring each candy to the lined tray. Try not to move the pieces unnecessarily once they are placed on the parchment. As the coating cools, it will become firm and create the characteristic chocolate shell. If desired, the finished candies can be refrigerated to speed up the setting process.
How to Get the Best Texture
Texture is one of the most important parts of this keto chocolate candy. The coconut center should remain soft enough to bite comfortably while still being firm enough to hold its shape. Chilling the filling before coating is therefore essential. The combination of coconut cream and coconut oil provides richness, while the desiccated coconut gives the center enough body to remain substantial.
For an especially neat result, keep the shaped coconut bars cold while working in small batches. Take only a few pieces from the freezer at a time and leave the remaining pieces chilled. This prevents the entire batch from becoming soft while you are dipping. It is a simple approach that can make the chocolate-coating stage much easier.
Easy Make-Ahead Keto Dessert
One of the most useful features of this recipe is that it can be prepared ahead of time. Once the chocolate coating has hardened, the candy can be transferred to an airtight container and kept chilled. Preparing a batch in advance means you have a homemade low-carb dessert ready whenever you want something sweet without starting a new recipe.
These chocolate coconut bars can also work well for dessert platters, holiday gatherings, snack trays, or casual treats with coffee and tea. Because they are individually portioned, they are easy to serve and simple to store. Keeping them refrigerated also helps the coconut center stay firm and the chocolate coating maintain its texture.
Storage and Serving
Store the finished keto chocolate nougat candy in an airtight container in the refrigerator. Keeping the pieces cold helps preserve their shape and keeps the chocolate shell firm. If you prefer a softer center, allow a piece to sit at room temperature for a few minutes before eating. This short resting period can make the coconut filling more tender without causing the chocolate coating to melt excessively.
The candy can also be kept in the freezer when longer storage is needed. Place parchment paper between layers so the pieces do not stick together. When you want to serve them, allow the desired number of pieces to soften slightly before eating. This makes the recipe particularly convenient for anyone who likes to prepare keto-friendly desserts in batches.
Common Problems and Simple Solutions
If the coconut bars fall apart while dipping, they probably need more chilling time or were not compressed firmly enough during shaping. Return the pieces to the freezer until firm and try again. If the chocolate coating is too thick, gently warm it and stir thoroughly. A small amount of coconut oil can be used according to the supplied recipe to improve its consistency.
If the finished candy becomes too soft, refrigeration is the simplest solution. Coconut-based fillings naturally become firmer when chilled, while the chocolate coating also benefits from a cool environment. For the cleanest presentation, keep the candies refrigerated until shortly before serving, especially when the kitchen is warm.
Frequently Asked Questions
Is this keto chocolate candy suitable for a low-carb diet?
This recipe is designed as a low-carb and keto-style dessert because it uses monkfruit sweetener, unsweetened coconut, and sugar-free chocolate rather than conventional sugar. However, the nutritional suitability depends on the specific brands and products used, particularly the chocolate and sweetener. Always check the nutrition label of your chosen ingredients when following a specific carbohydrate target.
Can I prepare these coconut chocolate bars in advance?
Yes. The recipe is particularly convenient for make-ahead preparation. Once the chocolate has completely set, store the candies in an airtight container in the refrigerator or freezer. Chilling also helps preserve the texture of the coconut center and keeps the chocolate coating firm.
Why does my coconut filling crumble?
A crumbly filling usually means the mixture has not been compressed enough or the coconut has absorbed more moisture than expected. Press the mixture firmly when shaping each bar and make sure all ingredients are thoroughly combined. Chilling the shaped pieces before coating can also help them maintain their structure.
How should I melt the chocolate?
Melt the chocolate gently using a double boiler or short microwave intervals. If using a microwave, heat for approximately 20 seconds at a time and stir between intervals. Avoid overheating because burned or overheated chocolate may become thick and difficult to use.
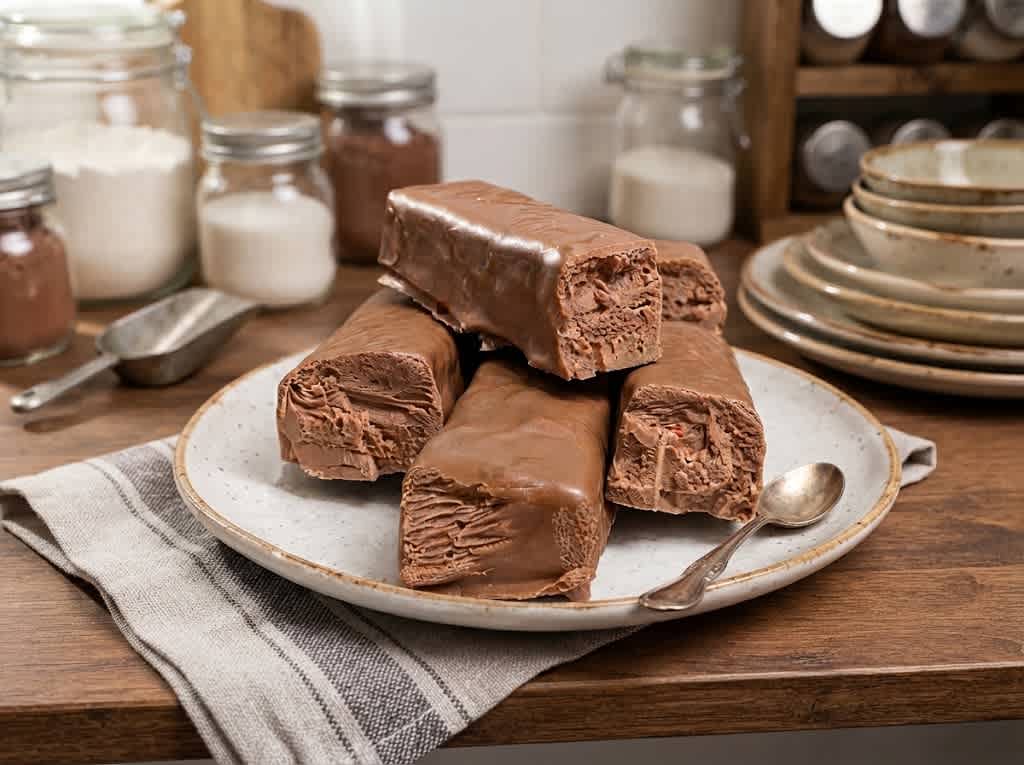
Easy Keto Chocolate Nougat candy
These Homemade Keto Bounty Bars are a delicious low-carb twist on the classic coconut chocolate treat. They feature a soft and creamy coconut filling coated in a rich layer of sugar-free chocolate. With only a handful of ingredients and no baking required, they’re perfect for keeping in the refrigerator or freezer whenever you want a quick keto-friendly dessert or snack.
20
servings15
minutes126
kcal15
minutesIngredients
½ can coconut cream (tinned)
¼ cup coconut oil, melted
2 cups unsweetened desiccated coconut
2 tablespoons monkfruit sweetener
7 ounces sugar-free chocolate chips or chocolate with high cocoa solids
Directions
- Line an 8-inch square baking pan with parchment paper. Alternatively, use a silicone mold or an ice tray if you prefer evenly shaped bars.
- In a medium mixing bowl, combine the coconut cream, melted coconut oil, unsweetened desiccated coconut, and monkfruit sweetener. Stir everything together until a thick, sticky mixture forms and the ingredients are evenly combined.
- Scoop portions of the coconut mixture and shape them into small rectangles about 2–3 inches long. If using silicone molds or an ice tray, firmly press the mixture into each cavity to create evenly sized bars.
- Arrange the shaped bars on a parchment-lined tray and place them in the freezer for 20–30 minutes, or until they become firm enough to handle.
- While the bars are chilling, melt the chocolate chips using a double boiler or microwave in 20-second intervals, stirring after each interval until the chocolate is completely smooth.
- Remove the chilled coconut bars from the freezer. Dip each bar into the melted chocolate, making sure it is fully coated. Lift each one with a fork, allowing the excess chocolate to drip back into the bowl.
- Return the coated bars to the parchment-lined tray. Chill them in the refrigerator or freezer for another 10–15 minutes until the chocolate coating is completely firm.
- Once the chocolate has hardened, the homemade keto Bounty bars are ready to enjoy. Serve immediately or store for later.
Notes
- If the coconut mixture feels too wet, simply mix in a little more desiccated coconut until it becomes easy to shape.
- For extra flavor, stir a drop of vanilla extract or almond extract into the coconut mixture.
- If the melted chocolate seems too thick for dipping, add 1 teaspoon of coconut oil and stir until smooth.
- Vegan chocolate can be used to make this recipe suitable for a low-carb vegan option.
- For a variation inspired by Almond Joy or Mounds bars, place a whole almond on top of each coconut bar before dipping it into the chocolate.
- Keeping the bars chilled helps maintain the best texture and makes them easier to handle.
Nutrition Facts
- Total number of serves: 20
- Calories: 127kcal
- Fat: 12g
- Carbohydrates: 7g
- Fiber: 5g
- Protein: 1g