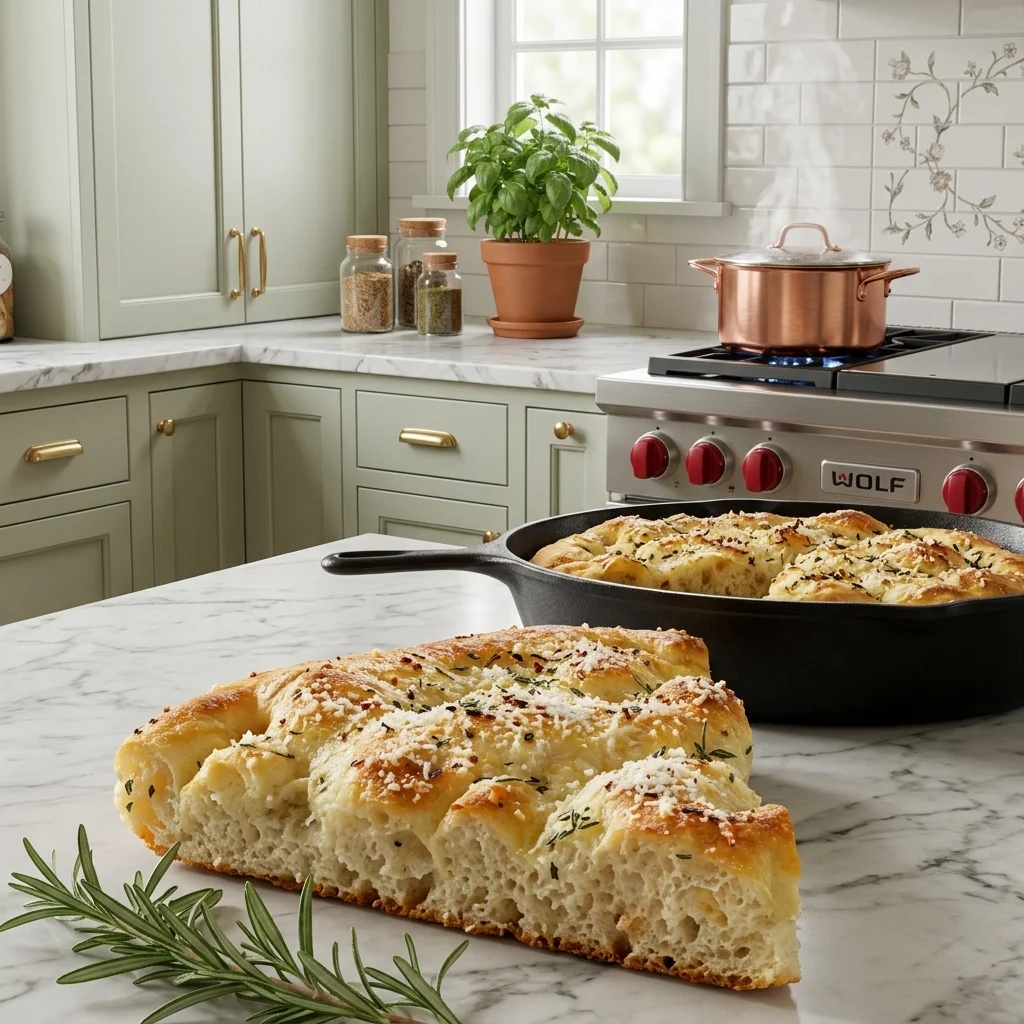
Gluten Free Focaccia Bread is a delicious Italian-inspired flatbread with a golden, crunchy exterior and a soft, airy interior. Made with gluten-free bread flour, milk, butter, yeast, and extra virgin olive oil, this homemade bread delivers the satisfying texture and flavor of traditional focaccia without using regular wheat flour. Fresh rosemary, sea salt, cracked black pepper, and freshly grated Parmigiano Reggiano give every bite a wonderful combination of savory flavors.
One of the best things about this easy gluten free focaccia recipe is that it does not require complicated bread-making techniques. The dough comes together with a mixer, making it suitable for home bakers who are new to gluten-free baking. After mixing, the dough needs time to rise before being transferred into an oiled skillet or baking pan. A short second rise helps create a light texture, while the generous amount of olive oil produces the characteristic crisp bottom and beautifully browned edges.
Homemade gluten free focaccia is an excellent choice when you want fresh bread to serve alongside dinner. It pairs especially well with spaghetti, meatballs, soups, salads, and other Italian-inspired meals. You can also slice it horizontally and use it to prepare delicious sandwiches. Whether served as a side dish or enjoyed on its own, this rosemary focaccia bread is a flavorful addition to your gluten-free baking collection.
This Easy Gluten Free Focaccia Recipe
There are plenty of reasons to add this homemade gluten free focaccia to your regular baking routine. First, the preparation is straightforward. You do not need to knead the dough by hand or spend time developing gluten, which makes the process different from traditional bread recipes. A stand mixer or handheld electric mixer helps combine the ingredients and creates a consistent dough.
Another advantage is the contrast in texture. The olive oil helps form a crisp bottom and golden edges, while the inside stays soft and fluffy. This combination makes the bread enjoyable both warm from the oven and later when used for sandwiches. The rosemary and cheese provide plenty of flavor without requiring complicated toppings or additional ingredients.
This recipe is also useful for preparing more than one loaf. The complete dough mixture can be divided between two 12-inch skillets, making it convenient to prepare one loaf for dinner and save another for later. Alternatively, the dough can be spread into a larger baking pan to create one generous focaccia.
How to Make Gluten Free Focaccia Bread
Step 1: Combine the Dry Ingredients
Begin by preparing a large mixing bowl. Add the gluten-free bread flour, granulated sugar, kosher salt, and instant yeast. Whisk everything together until the ingredients are evenly distributed. This step helps ensure that the yeast and salt are spread throughout the flour rather than concentrated in separate areas.
For consistent results, weighing the gluten-free flour is a good idea. Different flour blends can have different densities, so measuring by volume may produce variations in the dough. Once the dry ingredients are combined, prepare the milk and melted butter for mixing.
Step 2: Mix the Dough
Attach the beater blade to a stand mixer or prepare a handheld electric mixer. Start mixing the dry ingredients on low speed while gradually pouring in the milk and melted butter. Slowly adding the liquids allows them to incorporate more evenly into the flour mixture.
After the liquid ingredients have been added, increase the mixer speed to medium and beat the mixture for approximately five minutes. The resulting dough will be different from traditional wheat bread dough because gluten-free flour does not develop the same elastic structure. It should be thick, moist, and suitable for spreading into the baking pan.
Step 3: Allow the Dough to Rise
Transfer the mixing bowl to a warm, draft-free location and cover it with plastic wrap. Allow the dough to rise until it has approximately doubled in volume. This first fermentation takes around two hours, although the exact time may vary depending on the temperature of your kitchen and the activity of the yeast.
Avoid placing the bowl somewhere excessively hot because high temperatures can affect yeast performance. A comfortably warm location is sufficient. Once the dough has risen, it can be used immediately or refrigerated for later baking. The original recipe allows the prepared dough to be refrigerated for up to seven days.
Step 4: Prepare the Skillet with Olive Oil
Take a 12-inch cast iron skillet and pour approximately two to three tablespoons of extra virgin olive oil into the bottom. Spread the oil across the surface so that the dough will have an evenly coated base.
Olive oil plays an important role in focaccia baking. It helps prevent sticking, contributes to the crisp bottom crust, and gives the finished bread its signature flavor. If you do not have a cast iron skillet, another oven-safe skillet or shallow baking pan can be used.
Step 5: Transfer and Shape the Dough
Use half of the prepared dough for one 12-inch focaccia loaf. Place it directly into the oiled skillet, then drizzle approximately another two to three tablespoons of olive oil over the surface.
Dip your fingertips into the dough and gently press small indentations across the top. These dimples are a traditional feature of focaccia bread. Continue spreading the dough gently toward the edges of the skillet until it forms an even layer.
Do not worry if the surface looks slightly uneven. Focaccia is meant to have a relaxed, rustic appearance. The dimples also help hold the olive oil and seasonings, allowing the toppings to distribute nicely across the bread.
Step 6: Complete the Second Rise
Cover the skillet and leave the dough in a warm location for approximately 30 minutes. During this resting period, the dough should become slightly puffier and increase in size.
Unlike the first rise, the dough does not need to double in volume during this stage. The goal is to give it enough time to become light and airy before baking. Allowing the dough to rest also helps produce a softer interior once the focaccia is cooked.
Step 7: Add Rosemary, Sea Salt, Cheese, and Pepper
Preheat your oven to 400°F (approximately 200°C). Once the dough has completed its second rise, prepare the toppings.
Sprinkle the chopped fresh rosemary evenly over the surface. Follow with sea salt, cracked black pepper, and freshly grated Parmigiano Reggiano. Try to distribute the toppings across the entire loaf so that every portion receives a little of each flavor.
The rosemary provides a fragrant herbal aroma, while the Parmesan creates a savory topping that becomes lightly golden during baking. Olive oil helps the seasonings adhere to the dough and contributes to the crisp finish.
Step 8: Bake Until Golden Brown
Place the skillet in the preheated oven and bake for approximately 25 to 30 minutes. The focaccia should develop a golden-brown surface and a crisp exterior. The bottom should also become nicely browned from the olive oil in the skillet.
Baking time can vary depending on the thickness of the dough and the type of pan being used. Keep an eye on the bread toward the end of cooking, particularly if you are using a pan that is larger or smaller than the recommended 12-inch skillet.
Once baked, remove the focaccia from the oven and allow it to cool slightly before slicing. Cutting it while it is still warm makes it easy to serve alongside your favorite meal.
How to Serve Gluten Free Rosemary Focaccia
Freshly baked gluten free focaccia is incredibly versatile and can be served in several different ways. One of the simplest options is to cut the bread into triangles and serve it warm alongside pasta dishes. Its olive oil flavor and crisp edges make it an excellent companion for spaghetti, meatballs, lasagna, and creamy Italian sauces.
You can also serve focaccia with soups and salads. The soft center is ideal for soaking up flavorful sauces and broths, while the crunchy crust provides a satisfying contrast. For an appetizer, cut the bread into smaller pieces and serve it with olive oil or your preferred dipping sauce.
Another excellent option is to turn this focaccia into a sandwich. Allow the bread to cool slightly, then slice each piece horizontally. Add your preferred sandwich fillings, such as vegetables, cheese, or cooked meat. The sturdy yet tender texture makes it a practical alternative to ordinary sandwich bread.
Can You Make Gluten Free Focaccia Dairy Free?
Yes, this recipe can be adapted for people who prefer to avoid dairy ingredients. The original recipe uses regular milk and butter, but both can be replaced with suitable dairy-free alternatives.
For the milk, unsweetened soy milk or almond milk can be used in place of regular milk. Choose an alternative that is appropriate for baking and does not contain strong added flavors that could change the taste of the bread.
The butter can be replaced with a dairy-free butter alternative, such as Earth Balance, or with an equal amount of olive oil. Using olive oil instead of butter may slightly change the flavor and richness of the finished focaccia.
It is also important to remember that Parmigiano Reggiano is a dairy ingredient. Anyone preparing a completely dairy-free version will need to omit it or use a suitable dairy-free alternative. Always check ingredient labels to ensure that the selected products meet your dietary requirements.
Tips for Making the Best Gluten Free Focaccia
Choose the Right Gluten Free Flour
Use a gluten-free bread flour blend rather than assuming every gluten-free flour will produce the same results. Bread flour blends are formulated to provide structure and texture in yeast-based recipes. Changing the flour type may affect how much liquid the dough absorbs and how well it rises.
Measure Ingredients Carefully
Accurate measurements are particularly important when preparing gluten-free bread. Weighing the flour in grams helps reduce inconsistencies and makes it easier to repeat the recipe successfully. Measure the remaining ingredients carefully as well, especially the yeast, salt, and milk.
Do Not Skip the Rising Time
Allowing enough time for the dough to rise is essential for achieving a light texture. The first rise develops the dough’s volume, while the second rise helps the shaped focaccia become airy before baking. Rushing either stage may result in a denser loaf.
Use Enough Olive Oil
Olive oil contributes much of the characteristic texture and flavor of focaccia. Coating both the pan and the top of the dough helps create a crisp crust. Make sure the bottom of the skillet is properly coated before transferring the dough.
Adjust Baking Time for Different Pans
A smaller pan creates thicker focaccia, which may require additional baking time. A larger pan spreads the dough more thinly and may reduce the cooking time. Check the bread regularly and look for a golden-brown surface before removing it from the oven.
How to Store and Freeze Gluten Free Focaccia
Proper storage helps keep homemade gluten free focaccia enjoyable after baking. Once the bread has cooled, wrap it securely or place it in an airtight container. It can be kept at room temperature for a few days.
For longer storage, freezing is a convenient option. Divide the focaccia into individual portions before freezing so you can remove only the amount needed. Wrap the pieces securely to protect them from freezer odors and moisture loss. The original recipe recommends freezing the bread for up to two months.
When you are ready to serve frozen focaccia, allow it to thaw and warm it in the oven if desired. Reheating helps refresh the crust and makes the bread more enjoyable. Avoid leaving the bread uncovered for extended periods because gluten-free baked goods can dry out more quickly than expected.
Frequently Asked Questions
Is Gluten Free Focaccia Bread Easy to Make?
Yes. This recipe uses a simple mixing method and does not require traditional kneading. An electric mixer combines the ingredients, while the rising and baking stages take care of developing the bread’s texture. It is a good starting point for anyone learning to make homemade gluten-free yeast bread.
Does Gluten Free Focaccia Taste Like Regular Focaccia?
This version offers many of the qualities people enjoy in traditional focaccia, including a crisp exterior, soft center, olive oil flavor, and rosemary topping. The exact texture depends on the gluten-free bread flour blend used, but the finished bread can be a satisfying alternative to conventional focaccia.
Can I Make Two Focaccia Loaves from One Batch?
Yes. The full dough recipe is designed to make two 12-inch focaccia loaves. Divide the dough into two equal portions and prepare each in a separate skillet. This is useful when serving a larger family or when you want to save one loaf for another meal.
Can I Make One Large Focaccia Instead?
Yes. You can use the entire batch of dough to prepare one larger loaf in a half-sheet pan. Spread the dough toward the edges and double the quantities of olive oil, rosemary, sea salt, black pepper, and cheese used for the topping. Bake as directed, checking the bread for doneness.
What Can I Use Instead of a Cast Iron Skillet?
An oven-safe skillet or shallow baking pan can be used instead of a 12-inch cast iron skillet. Remember that changing the pan size can affect the thickness of the dough and the baking time. A smaller pan usually produces thicker bread, while a larger pan produces a thinner loaf.
Can I Prepare the Dough Ahead of Time?
Yes. After the first rise, the dough can be refrigerated for up to seven days according to the original recipe. This makes it convenient to prepare the dough in advance and bake fresh focaccia when needed. Allow for any additional resting time required before shaping and baking.
Gluten Free Focaccia Bread
 Recipe by admin1
A soft and airy homemade gluten free focaccia bread featuring a crispy golden crust, extra virgin olive oil, fresh rosemary, sea salt, cracked black pepper, and freshly grated Parmigiano Reggiano. Perfect as an Italian side dish or sandwich bread.
2
servings5
minutes30
minutes120
minutes2
hours55
minutesIngredients
3¼ cups (455 g) Kim’s gluten free BREAD flour blend
1 tablespoon plus 1 teaspoon (29 g) granulated sugar
2 teaspoons kosher salt
2 teaspoons rapid rise (instant) yeast
2½ cups (600 ml) milk
4 tablespoons butter, melted
About ¼ cup extra virgin olive oil
2 tablespoons chopped fresh rosemary
1 teaspoon sea salt
2 tablespoons freshly grated Parmigiano Reggiano
Cracked black pepper to taste
Directions
- Add gluten-free bread flour, sugar, kosher salt, and instant yeast to a large mixing bowl. Whisk until evenly combined.
- Using a stand mixer with a beater blade or a handheld mixer, gradually pour in the milk and melted butter while mixing on low speed. Increase to medium speed and beat for 5 minutes.
- Cover the bowl with plastic wrap and leave it in a warm, draft-free place until the dough doubles in volume, approximately 2 hours.
- Pour approximately 2–3 tablespoons of olive oil into the bottom of a 12-inch cast iron skillet.
- Place half of the prepared dough into the skillet and drizzle another 2–3 tablespoons of olive oil over the top.
- Use your fingertips to create dimples and gently spread the dough toward the edges of the skillet.
- Cover the skillet and allow the dough to rest for approximately 30 minutes until slightly puffed.
- Preheat the oven to 400°F (200°C).
- Sprinkle chopped rosemary, sea salt, cracked black pepper, and freshly grated Parmigiano Reggiano over the dough.
- Bake for approximately 25–30 minutes or until the focaccia develops a golden-brown crust.
- Remove from the oven, allow it to cool slightly, and cut into triangles. Serve warm with pasta or slice horizontally to make sandwiches.
Notes
- If you do not have a 12-inch cast iron skillet, use another oven-safe skillet or shallow baking pan. Adjust baking time according to the thickness of the dough.
- The full dough recipe makes two 12-inch focaccia loaves. Divide the dough equally between two skillets.
- Use the entire dough mixture in a large half-sheet pan. Double the quantities of olive oil, rosemary, sea salt, pepper, and cheese for the topping.
- Replace regular milk with soy or almond milk and butter with a dairy-free alternative or an equal amount of olive oil. Omit or replace the Parmesan for a completely dairy-free version.
- Keep the bread wrapped at room temperature for a few days.
- Freeze securely wrapped focaccia for up to two months.
- Enjoy with spaghetti, meatballs, soups, salads, or use as sandwich bread.