admin1
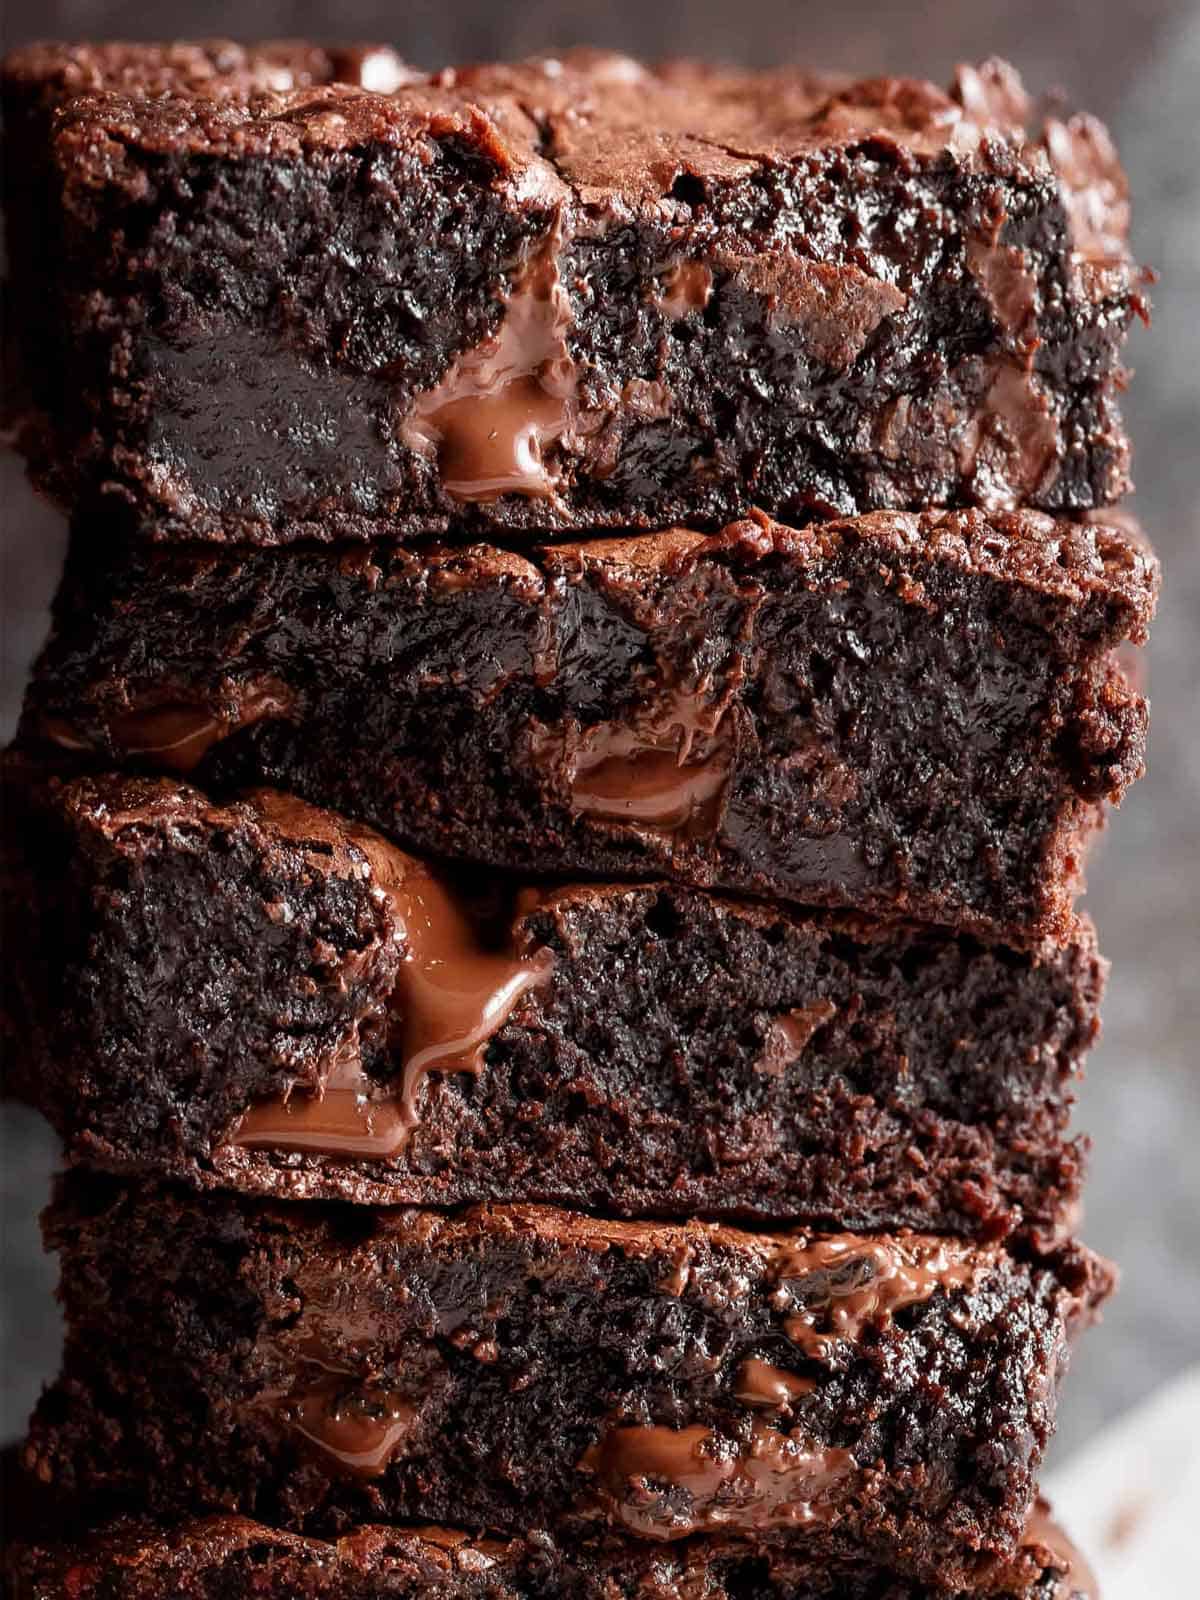
Alright, buckle up. This is a full, obsessive, brownie-lover’s manifesto—deeply fudgy, crackly-topped, rich without being cloying, and written for people who care about brownies. 🍫
Settle in.
The Ultimate Fudgy Brownies Recipe
There are brownies… and then there are fudgy brownies. Not cakey impostors pretending to be chocolate cake squares. Not dry, crumbly disappointments. Real brownies should be dense, glossy, intensely chocolatey, and just barely set in the center—so rich they almost feel illegal.
This recipe is the result of countless tests, tweaks, and side-by-side comparisons. Melted butter vs. oil. Cocoa powder vs. chocolate bars. Whisking vs. beating. Resting the batter. Baking low and slow. Every choice here exists for one reason: maximum fudge.
If you’ve ever wanted brownies with a shiny, crackled top and a center that stays soft for days, this is the recipe.
What Makes a Brownie Truly Fudgy?
Before we bake, let’s talk science (don’t worry, the tasty kind).
A fudgy brownie is defined by:
- High fat (butter + chocolate)
- Lower flour
- Minimal leavening
- Gentle mixing
- Slight underbaking
Cakey brownies rely on flour and air. Fudgy brownies rely on fat and sugar. The goal isn’t lift—it’s density.
This recipe uses:
- Melted butter for richness and chew
- Dark chocolate + cocoa powder for depth
- Brown sugar for moisture
- Extra egg yolk for creaminess
- Low flour to avoid structure overload
Every ingredient has a job. No freeloaders here.
Ingredients (Makes 16 Generous Brownies)
Chocolate Base
- 200g (7 oz) dark chocolate (60–70% cocoa), chopped
- ¾ cup (170g) unsalted butter
Sugars
- ¾ cup (150g) granulated sugar
- ½ cup (100g) brown sugar, packed
Eggs
- 2 large eggs, room temperature
- 1 extra egg yolk, room temperature
Dry Ingredients
- ½ cup (60g) all-purpose flour
- ¼ cup (25g) unsweetened cocoa powder (Dutch-process preferred)
- ½ teaspoon salt
Flavor Boosters
- 2 teaspoons vanilla extract
- Optional: ½ teaspoon espresso powder (does not make them taste like coffee—just deeper chocolate)
Optional Add-Ins (Choose Wisely)
- ¾ cup chocolate chunks or chips
- ½ cup toasted walnuts or pecans
- Swirls of peanut butter, tahini, or salted caramel
Equipment You’ll Need
- 8×8-inch (20×20 cm) metal baking pan
- Parchment paper
- Heatproof bowl
- Whisk
- Rubber spatula
Metal pans conduct heat better than glass, which helps avoid overbaked edges and raw centers.
Step-by-Step Instructions
1. Prep the Pan and Oven
Preheat your oven to 170°C / 340°F.
Line your pan with parchment paper, leaving a slight overhang on two sides. This makes removal easy and protects the edges from overbaking.
Lightly grease the parchment. Brownies deserve respect.
2. Melt the Butter and Chocolate
In a heatproof bowl set over gently simmering water (or in short microwave bursts), melt the butter and chopped dark chocolate together.
Stir slowly until smooth and glossy. Do not rush this. Overheated chocolate gets grainy, and grainy chocolate is heartbreak.
Remove from heat and let cool for 3–5 minutes. Warm is good. Hot is not.
3. Add the Sugars
Whisk both sugars into the melted chocolate mixture.
This step matters more than people realize. Dissolving the sugar into warm fat helps create that shiny, crackly top later. Whisk until the mixture looks thick and satiny, about 30–45 seconds.
4. Incorporate the Eggs
Add the eggs and extra yolk one at a time, whisking gently but thoroughly after each addition.
You’re not trying to whip air into the batter—just emulsify everything into a smooth, cohesive mixture.
Stir in the vanilla extract (and espresso powder, if using).
At this stage, the batter should look thick, glossy, and almost pudding-like.
5. Fold in Dry Ingredients
In a small bowl, whisk together:
- Flour
- Cocoa powder
- Salt
Sift if your cocoa is lumpy (and it usually is).
Add the dry ingredients to the batter and fold gently with a spatula until just combined. Stop the moment you no longer see streaks of flour.
Overmixing here is the enemy of fudginess.
6. Add Any Extras
If using chocolate chunks or nuts, fold them in now.
If swirling something like peanut butter or caramel, pour the brownie batter into the pan first, then add dollops on top and gently swirl with a knife.
7. Bake to Fudgy Perfection
Pour the batter into the prepared pan and smooth the top.
Bake for 22–26 minutes.
Here’s what you’re looking for:
- Set edges
- A slightly puffed, crackly top
- A toothpick inserted in the center should come out with thick, moist crumbs, not wet batter and not clean
If you’re unsure, err on the side of underbaking. Brownies continue to set as they cool.
8. Cool (Yes, You Must)
This is the hardest part.
Let the brownies cool in the pan for at least 45 minutes, ideally 1–2 hours. Cutting too early will give you molten chaos (delicious, but messy).
For ultra-clean slices, chill the brownies for 30 minutes before cutting.
Texture, Taste, and Why This Recipe Works
These brownies are:
- Dense but not heavy
- Fudgy without being greasy
- Deeply chocolatey without excessive sweetness
- Soft in the center with slightly chewy edges
The balance comes from using both melted chocolate and cocoa powder. Melted chocolate gives richness and body. Cocoa powder adds intensity and structure without extra fat.
The extra egg yolk increases tenderness and richness, while the reduced flour keeps the brownies from crossing into cake territory.
Storage and Make-Ahead Tips
- Store at room temperature in an airtight container for 3–4 days
- Refrigerate for up to 1 week (they get even fudgier)
- Freeze, tightly wrapped, for up to 3 months
Pro tip: Warm refrigerated brownies for 10–15 seconds in the microwave. Absolute magic.
Common Mistakes (and How to Avoid Them)
Brownies too cakey?
Too much flour or overmixing.
Dry brownies?
Overbaked or too little fat.
No crackly top?
Sugar not fully dissolved into the warm chocolate mixture.
Greasy brownies?
Too much butter or insufficient flour balance.
Final Thoughts
These brownies are unapologetically indulgent. They’re not meant to be light. They’re meant to be eaten slowly, preferably with a glass of milk, a scoop of vanilla ice cream, or straight from the pan at midnight.
If you’ve been searching for the one—the brownie recipe that makes people pause mid-bite and say, “Wait… who made these?”—this is it.
If you want, I can also:
- Adapt this into a one-bowl version
- Make it gluten-free
- Turn it into brownie cookies
- Or dial it even darker and more intense 😈