Making homemade sourdough bread does not have to be complicated or intimidating. This easy no-knead sourdough bread recipe creates a beautifully crisp crust, a soft and chewy interior, and the satisfying flavor that makes naturally fermented bread so popular. With an active sourdough starter, a few basic ingredients, and enough time for fermentation, you can make an artisan-style loaf in your own kitchen without complicated equipment or advanced baking skills.
This beginner-friendly sourdough bread combines white bread flour with whole wheat flour and a small amount of rye flour. The combination creates a balanced loaf with a pleasant texture and rich flavor. The recipe relies mainly on time, fermentation, gentle dough handling, and proper shaping rather than intensive kneading. That makes it an excellent choice for anyone learning how to bake sourdough bread at home.
Why Make Homemade Sourdough Bread?
Fresh homemade sourdough has a texture and flavor that can be difficult to reproduce with ordinary packaged bread. The crust becomes deeply golden and crisp during baking, while the center remains tender, chewy, and moist. Because the dough is naturally fermented, it develops a distinctive flavor that becomes more complex as the fermentation time increases.
Another advantage of baking your own bread is having control over the ingredients. This recipe uses a combination of bread flour, whole wheat flour, rye flour, sourdough starter, water, and salt. You can therefore prepare a loaf without the unnecessary additives that may appear in some commercially produced breads. Homemade bread can also be an economical option and allows you to avoid some of the packaging associated with store-bought loaves.
What Makes This a No-Knead Sourdough Recipe?
Traditional bread recipes often require extended kneading to develop gluten and strengthen the dough. This sourdough recipe takes a gentler approach. Instead of continuous kneading, the dough develops strength through an autolyse, fermentation, and several rounds of stretch-and-fold movements.
During a stretch and fold, one portion of the dough is gently lifted, stretched, and folded over itself. The bowl is then turned and the movement is repeated around the dough. These short sessions gradually create strength and structure without requiring strenuous kneading. As fermentation continues, the dough becomes smoother, stronger, and more elastic.
Preparing the Sourdough Starter
The sourdough starter is one of the most important parts of this recipe. Feed the starter approximately 4 to 10 hours before preparing the dough and allow it to become fully active. A ready starter should look bubbly, have increased significantly in volume, and be near the peak of its activity rather than already collapsing.
The exact time required depends on the strength of your starter and the temperature of your kitchen. A cooler environment may slow fermentation, while warmer conditions can make the starter become active more quickly. If your starter has been sitting unused for several weeks, feeding it twice before baking can help restore its activity.
Mixing the Dough
When the starter is approaching peak activity, begin by preparing the flour and water mixture. Combine the flour with almost all of the water, keeping approximately 10 to 20 percent of the water aside for later. Mix everything with wet hands until the flour is thoroughly hydrated and no dry areas remain.
At this stage, the dough will appear loose, sticky, and somewhat shaggy. This is completely normal. Do not add the sourdough starter or salt yet. Cover the mixture and let it rest at room temperature for approximately one hour. This resting period, known as an autolyse, gives the flour time to absorb the water and begins developing the dough’s structure before fermentation.
After the resting period, add the active sourdough starter, salt, and remaining water. Mix thoroughly using clean, wet hands. The dough may still feel loose, but it will gradually become more cohesive as you work with it. Wet hands are especially useful because they reduce sticking while allowing you to handle the dough gently.
Bulk Fermentation and Stretch-and-Fold
Once the dough has been mixed, cover the bowl and allow it to undergo bulk fermentation at room temperature for approximately four hours. During this stage, perform three to four rounds of stretch and folds, spacing each round about 30 minutes apart.
For the first stretch and fold, gently lift one side of the dough and stretch it upward without tearing it. Fold that section back over the center. Rotate the bowl approximately 90 degrees and repeat the process several times until you have worked around the dough. The dough may feel loose during the first round, but it should gradually become stronger and more resistant as the folds continue.
Continue covering the bowl between each round. After completing three or four sets, leave the dough undisturbed and covered for the remaining portion of the bulk fermentation. Avoid aggressively handling the dough because gentle movements help preserve the developing structure and air within the dough.
Choosing the Right Fermentation Temperature
Temperature has a major effect on sourdough fermentation. A room temperature around 70 to 80°F is generally suitable for active fermentation. At these temperatures, the starter and dough can develop steadily and rise effectively. Temperatures that become too warm can accelerate fermentation and increase the risk of over-proofing.
If your kitchen is particularly cool, fermentation may take longer. Rather than relying only on the clock, pay attention to the dough itself. Its volume, texture, elasticity, and overall activity provide useful clues about fermentation progress. A food thermometer can also help you monitor the dough or the surrounding environment when temperature is difficult to judge.
Shaping the Sourdough Loaf
After bulk fermentation is complete, gently transfer the dough onto a lightly floured surface. Begin by pre-shaping the dough into a round or oval form that matches the shape of your proofing basket. Work carefully so you do not unnecessarily deflate the dough.
Next, turn the dough so the seam side is underneath. Using your hands or a dough scraper, gently pull and rotate the dough toward yourself while applying slight downward pressure. This movement creates surface tension across the outer portion of the dough, helping the loaf hold its shape during proofing and baking.
Place the shaped dough seam-side up inside a lightly floured banneton proofing basket. Rice flour can be particularly useful for dusting because it helps reduce sticking. If desired, allow the shaped dough to rest on the counter for approximately 10 to 20 minutes before completing the final shaping.
Overnight Cold Proofing
Once shaped, cover the banneton and transfer it to the refrigerator for cold proofing. The dough can remain refrigerated for approximately 8 to 24 hours, with an overnight period of around 10 to 14 hours being a convenient option.
Cold fermentation slows the activity of the dough and allows the sourdough flavor to develop gradually. It also makes the dough easier to handle when it is time to score and bake. Keeping the dough cold until it enters the oven helps it maintain its shape and makes scoring cleaner.
Preheating the Oven and Dutch Oven
When you are ready to bake, preheat the oven to approximately 475 to 500°F. The source recipe uses 475°F as a preferred temperature, particularly when working with a convection oven that runs hot. Because ovens vary, you may need to adjust the temperature according to how your particular oven performs.
Place the Dutch oven or combo cooker inside the oven while it preheats and allow it to heat for about one hour. A thoroughly heated baking vessel is important because it helps the dough begin baking immediately and supports strong oven spring and crust development.
Scoring and Baking Sourdough Bread
Keep the dough refrigerated while the oven and baking vessel heat. When everything is ready, place parchment paper and a cutting board over the banneton, then carefully invert the dough. Lift away the basket and lightly dust the surface with flour if desired.
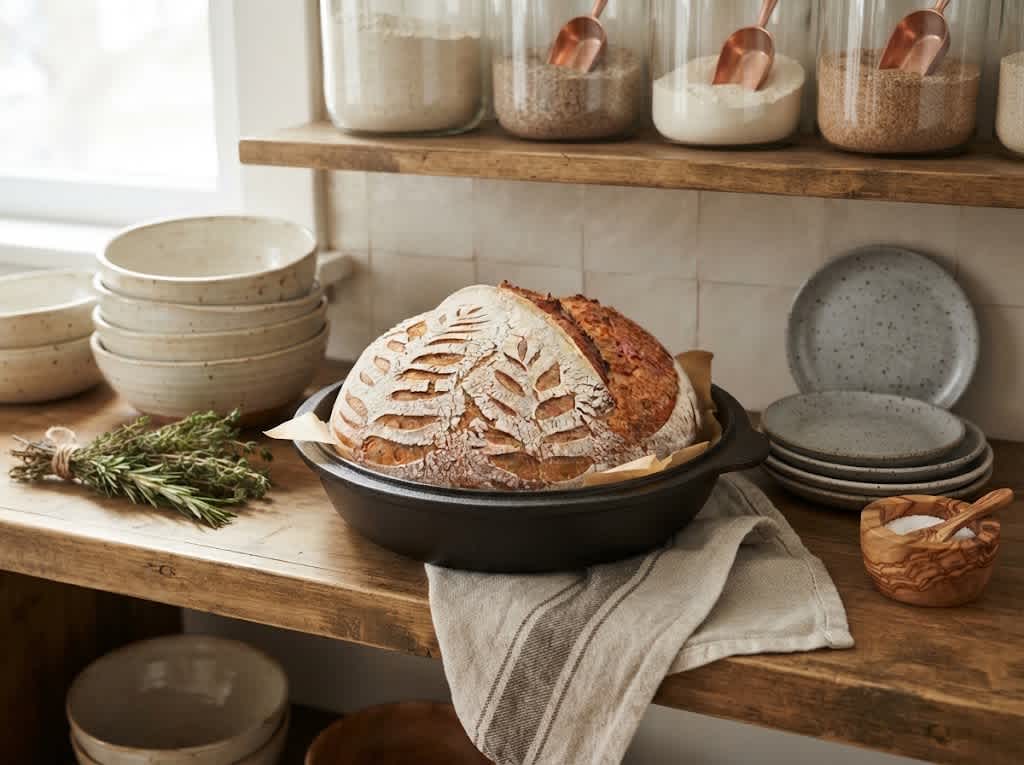
Use a bread lame to score the cold dough. One deeper score across the top provides a controlled place for the bread to expand during baking. Additional shallow cuts can be used for decoration. Carefully transfer the dough, using the parchment paper or a reusable silicone bread mat, into the hot Dutch oven or combo cooker.
Bake the loaf covered for approximately 35 to 37 minutes. Then remove the lid and continue baking uncovered for another 5 to 10 minutes. Removing the lid allows the crust to become deeper in color and crispier. Once baked, immediately transfer the loaf to a wire rack.
Cooling Homemade Sourdough
Although freshly baked bread smells tempting, allow the loaf to cool completely before slicing. Cutting sourdough bread while it is still very hot can release steam too quickly and may result in a gummy interior. Allowing several hours of cooling gives the crumb time to finish setting and helps produce the chewy texture associated with well-baked sourdough.
A fully cooled loaf is also easier to slice cleanly. Use a sharp bread knife and gentle sawing motions rather than pressing down heavily on the crust. This helps preserve the airy interior and reduces the chance of crushing the loaf.
How to Store Sourdough Bread
For short-term storage, wrap the cooled loaf in a clean tea towel and place it inside a brown paper bag. Homemade sourdough is generally at its best during the first three to four days, although it can remain usable for approximately a week when stored properly.
If the bread begins to lose its freshness, toasting can restore much of its appealing texture. Sourdough can also be sliced before freezing. Frozen slices can be toasted directly when needed, making this a convenient way to preserve extra bread for several months.
No-Knead Sourdough Bread
 Recipe by admin1
A beginner-friendly homemade sourdough bread recipe made with active sourdough starter, white bread flour, whole wheat flour, and rye flour. The loaf develops a crisp golden crust, a soft chewy center, and a naturally fermented flavor through an overnight cold proof.
1
servings20
minutes45
minutes16
hours17
hours5
minutesIngredients
100 grams active sourdough starter
470 grams total flour: 310 grams white bread flour, 140 grams whole wheat flour, and 20 grams rye flour
350 grams filtered water, approximately 1.5 cups; in very humid climates, start with 1.25 cups and add more as needed
10 grams salt; sea salt, kosher salt, or Himalayan salt is preferred over iodized table salt
Directions
- Feed the sourdough starter 4 to 10 hours before making the dough. Let it reach peak activity, when it is bubbly, has at least doubled in size, and has not yet started to deflate.
- Combine the flour with almost all of the water, reserving approximately 10 to 20 percent of the water. Mix with wet hands until thoroughly combined. Do not add the starter or salt yet. Cover and rest for about one hour at room temperature.
- Add the active sourdough starter, salt, and remaining water. Mix thoroughly with clean, wet hands. If desired, use a gentle slap-and-fold technique to help tighten the dough.
- Cover the dough and leave it at room temperature for approximately four hours.
- After 30 minutes, perform the first stretch-and-fold. Repeat every 30 minutes for a total of three to four rounds. Keep the dough covered between each set.
- After the final stretch-and-fold, leave the dough covered and undisturbed for the remaining approximately two hours of bulk fermentation.
- Gently transfer the dough onto a lightly floured surface and shape it into a round or oval form.
- Turn the dough seam-side down and gently pull and rotate it toward yourself while applying slight downward pressure.
- Place the shaped dough seam-side up in a lightly floured banneton. Rice flour can help prevent sticking.
- Allow the dough to rest for 10 to 20 minutes if desired, then complete the final shaping before returning it to the banneton.
- Cover the banneton and refrigerate for 8 to 24 hours. An overnight proof of approximately 10 to 14 hours works well.
- Preheat the oven to 475 to 500°F. Place the Dutch oven or combo cooker inside the oven and heat it for approximately one hour.
- Remove the dough from the banneton onto parchment paper. Lightly dust with flour if desired and score the cold dough using a bread lame.
- Carefully transfer the dough into the hot Dutch oven or combo cooker. Bake covered for 35 to 37 minutes, then uncover and bake for another 5 to 10 minutes.
- Transfer the finished loaf immediately to a wire rack. Allow it to cool for several hours before slicing.
Notes
- To double the recipe, double all ingredients and divide the dough into two loaves during shaping.
- A round boule can be created by stitching the dough toward the center from opposite sides.
- For an oval batard, shape the dough into a longer form and pinch the ends.
- If the loaf bottom browns too quickly, place an empty cookie sheet on the oven rack directly below the Dutch oven or combo cooker.
- Allow the finished bread to cool completely before slicing for the best crumb texture.
- Store cooled sourdough in a clean tea towel inside a brown paper bag.
- For longer storage, slice and freeze the bread, then toast slices directly from frozen.